eveloping a WordPress Website in Docker on a Remote Server (with Zed over SSH)
When building a modern WordPress project, it’s often beneficial to separate development and execution environments. One effective setup is to run WordPress in Docker on a remote server while editing files locally via SSH using a capable editor like Zed. This workflow brings several advantages in performance, safety, and convenience.
1. Reduced Wear on Local SSDs
When developing front-end assets like CSS and JavaScript, build tools such as Webpack, Vite, or Gulp can generate thousands of small read/write operations per rebuild. On laptops with SSDs, this constant I/O can contribute to unnecessary wear and thermal stress over time.
By running Docker on a remote host, these operations happen on the server’s storage, not your local disk. Your local machine only handles the code editing and synchronization over SSH — no heavy recompilation or filesystem thrashing.
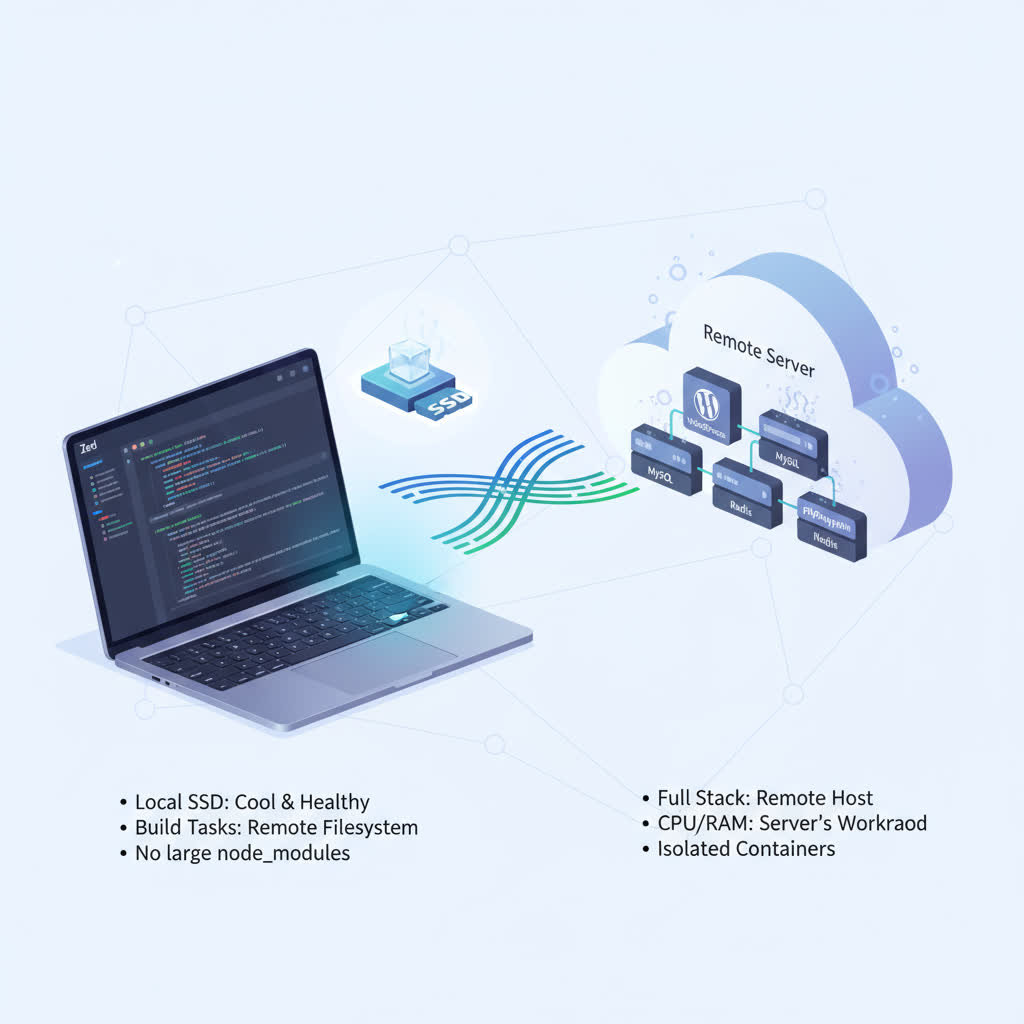
In short:
- Local SSD stays cool and healthy
- Build tasks run on the remote machine’s filesystem
- No need to sync large node_modules directories locally
2. Full Execution on the Remote Host
With Docker Compose managing your WordPress, MySQL, and supporting services (e.g., Redis, phpMyAdmin), the entire stack runs remotely. This means:
- PHP, Nginx, and MySQL workloads don’t consume your laptop’s CPU/RAM.
- All containers are isolated and can mirror your production environment closely.
- You can rebuild, restart, and test everything remotely without affecting your local machine.
You simply connect to the remote host via SSH and let Docker handle the rest. The development experience remains smooth — Zed’s SSH integration allows you to edit files directly on the remote filesystem as if they were local.
Folder structure:
project-name/
├── Dockerfile
├── docker-compose.yml
├── wp-content/
│   ├── themes/
│   └── plugins/
Dockerfile is optional only if you need custom built Docker image.
Benefits
- Stable environment: The remote Docker setup ensures consistency between developers or between dev/staging/production.
- Lightweight local setup: You can work even from a low-powered laptop or Chromebook — all heavy lifting happens on the server.
- Easy backups: Since everything (code + containers + volumes) lives on the remote host, backups can be done centrally.
- Security & isolation: Docker keeps the environment contained, and SSH ensures encrypted access.
Conclusion
Developing WordPress in Docker on a remote server — while editing via SSH with an editor like Zed — offers an ideal mix of speed, safety, and flexibility. Your SSD stays safe from constant rebuilds, your local machine remains light, and your workflow closely mirrors production. It’s a professional, future-proof approach to WordPress development.
# Custom Dockerfile with WP-Cli inside.
# Use the official WordPress image as a base
FROM wordpress:latest

# Download and install WP-CLI into a known, reliable location
RUN curl -O https://raw.githubusercontent.com/wp-cli/builds/gh-pages/phar/wp-cli.phar && \
    chmod +x wp-cli.phar && \
    mv wp-cli.phar /usr/local/bin/wp
# docker-compose.yml
version: "3"
services:
# Database
db:
image: mariadb:10.6.4-focal
volumes:
- db_data_volume:/var/lib/mysql
restart: always
environment:
MYSQL_ROOT_PASSWORD: password
MYSQL_DATABASE: wordpress
MYSQL_USER: wordpress
MYSQL_PASSWORD: wordpress
networks:
- wpsite-network
# phpmyadmin
phpmyadmin:
depends_on:
- db
image: lscr.io/linuxserver/phpmyadmin:latest
restart: always
ports:
- "8881:80"
environment:
PMA_HOST: db
MYSQL_ROOT_PASSWORD: password
networks:
- wpsite-network
# WordPress
wordpress:
depends_on:
- db
# assume that you run remotely on SBC ARM architecture
image: arm64v8/wordpress
# fix for write privileges
user: "${LOCAL_UID}:${LOCAL_GID}"
ports:8888:80"
restart: always
volumes: ["./:/var/www/html"]
environment:
WORDPRESS_DB_HOST: db:3306
WORDPRESS_DB_USER: wordpress
WORDPRESS_DB_PASSWORD: wordpress
#WORDPRESS_DEBUG_LOG: 'true'
#WORDPRESS_DEBUG: 'true'
networks:
- wpsite-network
networks:
wpsite-network:
volumes:
db_data_volume:Fix for upload file sizes: edit your .htaccess file in the root folder, add these lines at the bottom of the file and restart container.
php_value upload_max_filesize 256M
php_value post_max_size 256M
php_value max_execution_time 300
php_value max_input_time 300
All for now.
⚠️ Disclaimer
This setup and guide are provided as-is for educational and development purposes. While it can significantly improve your workflow, you use it entirely at your own risk. Always ensure you have proper backups, secure configurations, and a safe testing environment before deploying any changes to production.
Leave a Reply